Retail Store Server Room Setup: A Small-Store Guide
- Sosa Solutions NYC
- Aug 9
- 16 min read
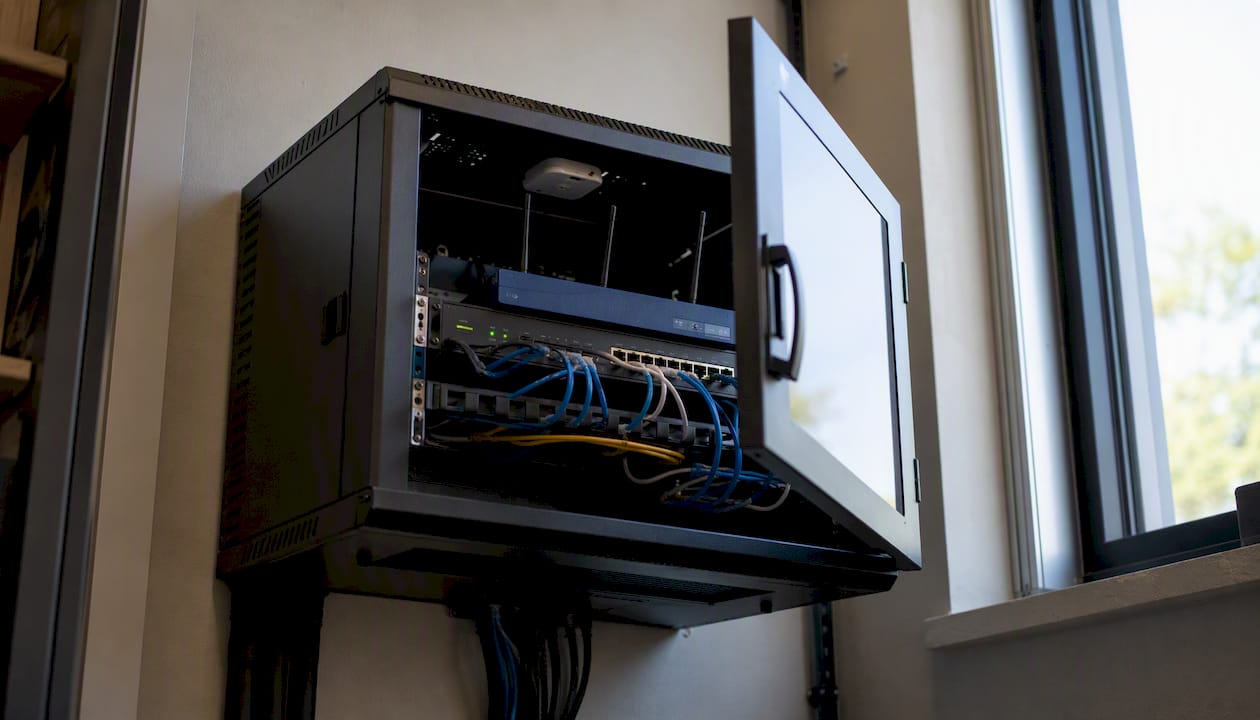
A small retail store needs a lockable back-office IT closet with an 8U–12U wall-mount rack, a managed PoE switch, an SD-WAN router/firewall, a UPS, and an environmental sensor, built to keep POS, cameras, and Wi-Fi running while staying within PCI DSS physical-security requirements. That is the whole premise. Everything else in this guide is execution detail.
Start here: before ordering a single piece of hardware, walk the store and identify a lockable room or closet that sits close to the ISP demarcation point and near the center of your cable runs. That one decision shapes every cost and complexity trade-off that follows.
Critical items to order or allocate before installation:
8U–12U wall-mount rack (or floor-standing cabinet if space allows)
Managed PoE switch (24-port minimum for most stores)
SD-WAN router/firewall with cellular failover slot
APC or Vertiv rack UPS (sized to load; see Section 4)
Rack PDU with individual outlet switching
1U patch panel (24-port or 48-port)
12–24 Cat6 runs per the retail cabling template
Environmental sensor (temperature/humidity with email/SMS alert)
Keypad or badge-access lock for the closet door
Cable managers (horizontal and vertical), blanking panels, and labels
Ballpark hardware and installation costs by tier:
These are U.S. market estimates for small stores (under 5,000 sq ft). Costs shift based on conduit requirements, union labor rules in cities like New York, and whether you include a managed-service contract.
Key Takeaways
A compliant, reliable retail server room starts with a lockable central closet, a properly sized rack, and documented VLAN segmentation — those three decisions determine everything else.
Point | Details |
Start with a site survey | Map cable paths and demarc location before ordering any equipment to avoid costly redesigns. |
Use an 8U–12U wall-mount rack | This size fits switching, routing, UPS, and cabling for most stores under 5,000 sq ft. |
Enforce POS VLAN segmentation | Keep POS on a dedicated VLAN with firewall rules to minimize PCI DSS audit scope. |
Size UPS to full rack load | Calculate total wattage including PoE load; target 10–30 minutes of runtime with 20% headroom. |
Sosasolutionsnyc builds it for you | Site survey, cabling, equipment install, and PCI-aware documentation for NY and FL retail stores. |
Table of Contents
What temperature and humidity should a server room maintain?
How do you secure the server room against unauthorized access?
How do you build redundancy and backups into a retail store?
PCI DSS compliance and network segmentation for retail stores
Sosasolutionsnyc handles the build so you can focus on the store
Where should you put the server room in your store?
Location is the decision most small retailers get wrong, and it costs them later. The Telecommunications Industry Association sets the copper Ethernet distance limit at under 90 meters from the network equipment to any endpoint — that single constraint should drive your room selection more than convenience does.
What to verify before committing to a location:
Lockability: The room must accept a keyed or badge-access lock. PCI DSS Requirement 9 mandates physical access controls for any space housing cardholder data environment (CDE) equipment.
Centrality: Measure cable-path distances (not straight-line) to your farthest POS terminal, AP, and camera. All must stay under 90 meters.
ISP demarc proximity: The closer the room is to where the ISP fiber or coax enters the building, the shorter and cheaper your demarc extension run.
Ventilation: The room needs either existing HVAC supply or space for a dedicated mini-split or portable unit. A sealed closet with no airflow will overheat equipment within hours.
Landlord and building constraints: In multi-tenant buildings, the electrical panel and riser closets may be shared. Confirm you have exclusive access rights before planning equipment there.
Avoid public-facing closets, shared janitorial storage, or any space where non-IT staff regularly enter. A back-office IT closet, a dedicated telecom room, or a walled-off section of a stockroom all work — provided they meet the criteria above.
Physical clearances to plan for:
Minimum 24 inches of clearance in front of the rack for service access
Door width of at least 36 inches if you plan to roll in a floor-standing cabinet
Ceiling height of at least 7 feet for a standard 42U rack (not needed for wall-mount, but good to confirm)
Accessible conduit pathway to ceiling for cable runs to sales floor APs and cameras
Pro Tip: Before signing a lease or finalizing a store layout, ask the landlord for the building’s electrical panel schedule and riser-closet access policy in writing. Discovering that the only viable IT closet is a shared building riser — with no exclusive lock — after you’ve ordered equipment is an expensive surprise.
How do you size the rack and plan your cabling?
For most small retail stores, an 8U–12U wall-mount rack is the right call. It holds a patch panel, managed switch, router/firewall, and a 1U UPS without wasting space or budget. Move to a 18U–24U floor-standing cabinet when you add a local server, NVR with multiple drives, or plan to expand to a second store’s worth of gear in the same location. For extremely constrained footprints, Vertiv’s micro data-center solutions integrate power, cooling, and racking into a single sealed unit — worth considering when you have no dedicated room at all.
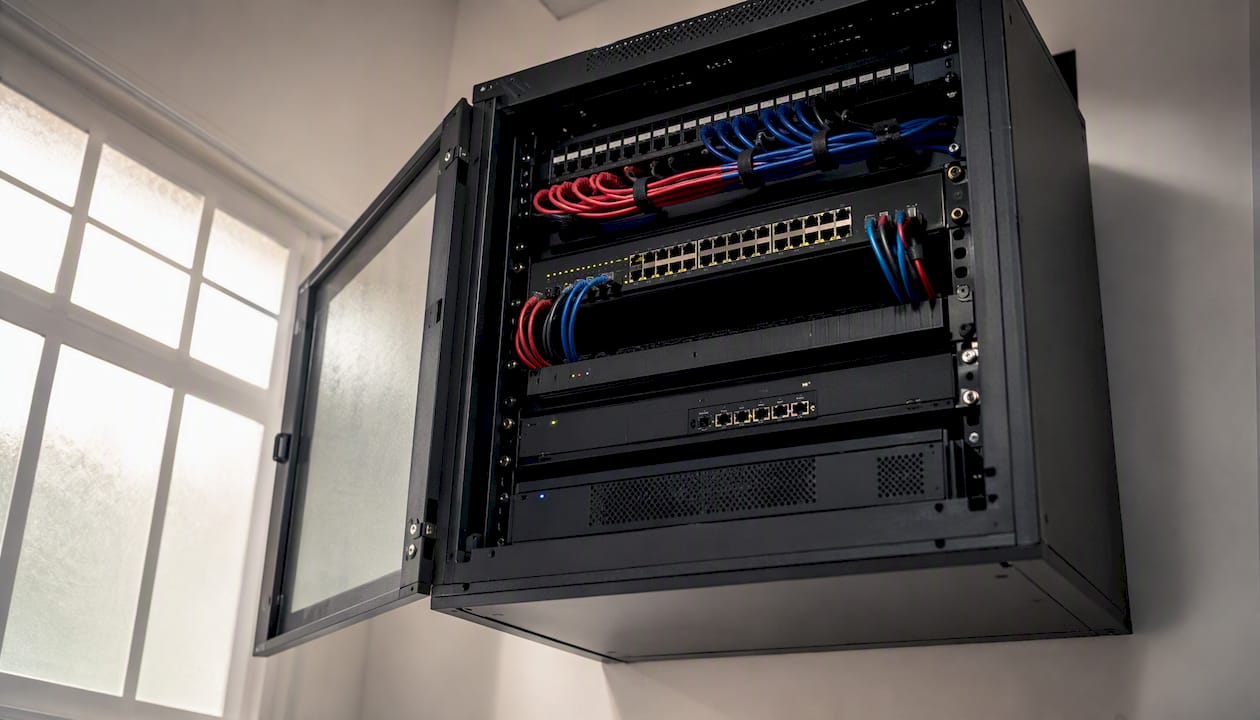
Standard rack elevation for a small retail store (8U–12U):
U Position | Device | VLAN / Purpose |
U1–U2 | 24-port Cat6 patch panel | All drops terminate here |
U3 | 24-port managed PoE switch | POS, cameras, APs, back-office |
U4 | SD-WAN router/firewall | WAN, VLAN routing, firewall |
U5 | Cellular failover modem/router | Backup WAN |
U6–U7 | 1U NVR (camera recording) | Camera VLAN |
U8 | 1U rack UPS | All above devices |
Blank any unused Us with blanking panels to maintain front-to-back airflow.
Cabling template by device type:
A retail store cabling template recommends 12–24 Cat6 drops per location. Here is how to allocate them:
POS terminals: 1 drop per register plus 1 spare per zone
Wireless APs: 1 drop per AP (PoE-powered)
IP cameras: 1 drop per camera (PoE-powered)
Back-office workstations/printers: 2–4 drops
NVR and server shelf: 1–2 drops
Spare/expansion: 2–4 labeled drops capped at the patch panel
Color-coding for PCI scope visibility:
Yellow Cat6: POS VLAN (CDE scope)
Blue Cat6: Data/back-office VLAN
Gray Cat6: Camera VLAN
Green Cat6: Guest Wi-Fi AP uplinks
Label both ends of every run with a printed cable ID that matches your patch-panel map. This makes PCI audits faster and troubleshooting faster.
What power and electrical work does a server room need?
The IT closet needs its own dedicated branch circuit, separate from lighting and general-purpose outlets. A shared circuit that trips during a busy Saturday afternoon takes down POS, cameras, and Wi-Fi simultaneously. That is not a theoretical risk.
Required electrical items:
Dedicated 20A (minimum) branch circuit to the IT closet, on its own breaker
Rack-mount PDU with individual outlet switching (lets you remote-cycle devices)
Rack UPS sized to the actual load (see below)
Whole-rack surge protection if the UPS does not include it
Sizing a UPS for a typical small retail store:
Add up the wattage of every device in the rack. A realistic small-store load looks like this:
24-port managed PoE switch: ~150W at 50% PoE load
SD-WAN router/firewall: ~50–80W
NVR (4–8 cameras): ~60–100W
Cellular modem: ~20W
Environmental sensor/misc: ~10W
Total: roughly 290–360W. A 750VA / 500W UPS gives you 10–15 minutes of runtime at that load — enough to complete transactions in progress and execute a graceful shutdown. Size up to a 1500VA unit if you want 20–30 minutes, which is the target range for most small stores. APC (Schneider Electric) Smart-UPS units are the standard choice here; they support SNMP monitoring and can trigger automated shutdown scripts.
Pro Tip: If your store is in a location with frequent outages longer than 30 minutes (common in parts of Florida during hurricane season), spec a transfer switch (ATS) and coordinate with your landlord or building management about generator access. A UPS alone will not carry you through a multi-hour outage.
What temperature and humidity should a server room maintain?
The University of Texas at Dallas server-room standard applies similar environmental targets to small server closets and rack installations. Staying in that range protects manufacturer warranties and keeps failure rates predictable.
Monitoring options for small budgets:
Networked temperature/humidity sensors (Sensorist, Govee, or enterprise-grade units from APC) that send SNMP traps or email/SMS alerts when thresholds are crossed
SNMP environmental monitoring via your managed switch’s NMS (SolarWinds, PRTG, or LibreNMS for open-source)
UPS management cards (APC AP9641 or equivalent) that include environmental ports for external sensors
Passive vs. active cooling:
A wall-mount rack in a back-office room with existing HVAC supply and return vents often needs nothing extra — provided the closet door is not sealed. If the room has no HVAC supply, a dedicated mini-split (12,000 BTU handles most small racks) is the right answer. Portable units work in a pinch but require manual condensate management and are not reliable for 24/7 operation.
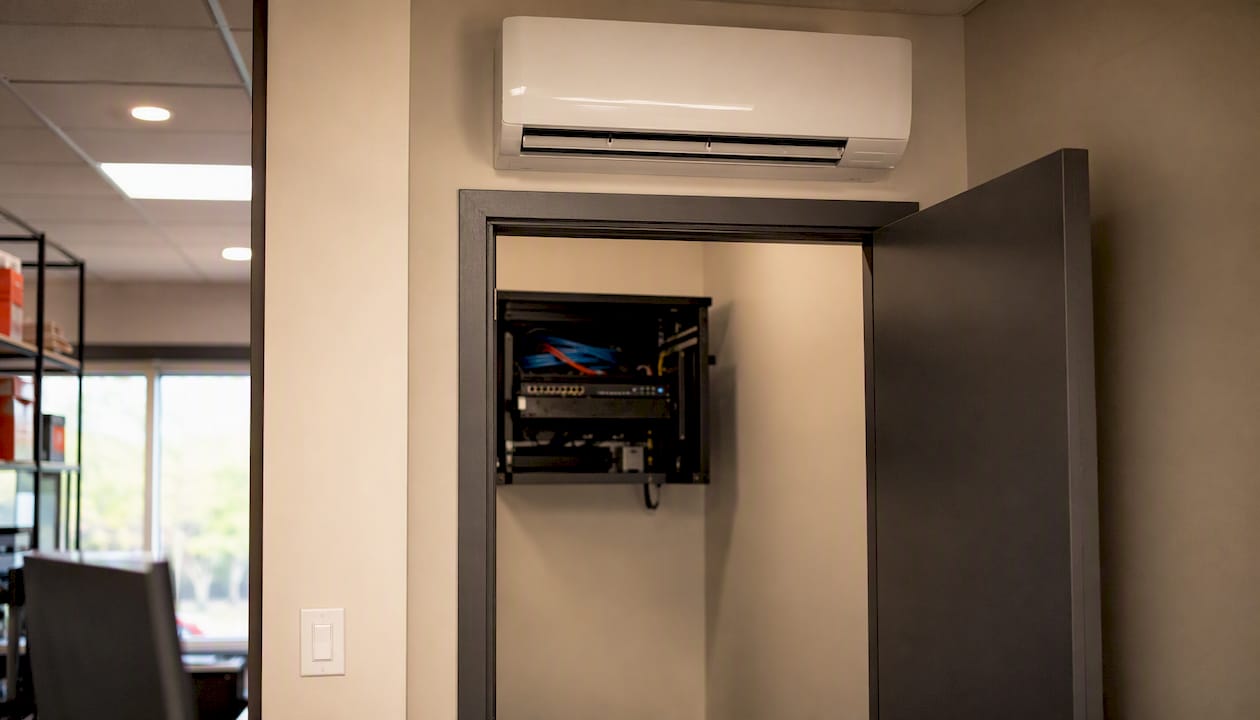
For extremely tight spaces, Vertiv’s integrated micro data-center cabinets include self-contained cooling — eliminating the room-cooling problem entirely at the cost of a higher upfront spend.
Pro Tip: Place sensors at three points in the rack: top (hottest exhaust zone), middle, and bottom (intake). A single sensor at eye level misses the thermal gradient that kills equipment at the top of the rack first. If you’re on a Sosa managed-service plan, those sensor alerts can route directly to the NOC for 24/7 response.
Rack mounting and cable management best practices
Consistent rack layout across every store location cuts mean time to repair. When a technician walks into any of your stores, they should find the patch panel in U1–U2, the switch in U3, and the UPS at the bottom — every time. That predictability is worth more than any clever per-store customization.
Rack hardware checklist:
1U horizontal cable managers above and below the patch panel
Vertical cable managers on both sides of the rack interior
Blanking panels for all unused Us (airflow, not aesthetics)
Velcro cable ties (not zip ties — you will move cables)
Printed cable labels on both ends of every run
Mounting shelf for any non-rack-mount devices (label printers, etc.)
Airflow panels if mixing front-exhaust and rear-exhaust devices
Numbered steps for mounting a small retail rack:
Mount the wall-mount rack at 48–54 inches from the floor to the bottom of the rack (comfortable working height).
Install vertical cable managers before mounting any devices.
Mount the patch panel first (top of rack), then work downward: switch, router, NVR, UPS.
Run all patch cables from the panel to the switch before powering anything on.
Bundle and route cables through horizontal managers; leave 12-inch service loops at each device.
Label every patch cable at both ends with the same ID as the corresponding wall-port label.
Install blanking panels in all empty Us.
Photograph the completed rack from the front and rear before closing up.
Color-coding by VLAN (yellow for POS, blue for data, gray for cameras) makes PCI scope immediately visible during audits and during troubleshooting at 2 AM.
What network devices does a retail store server room need?
The minimum device set for a small retail store is: an SD-WAN edge router with cellular failover, a stateful firewall (often integrated into the router), a managed PoE switch, wireless APs, and an NVR. The Cisco validated retail SD-WAN profile documents this exact topology for small-branch retail and adds centralized policy management across locations.
Device tiers by store size:
Entry (under 1,500 sq ft, 2–4 POS): Cisco Meraki MX67 or Ubiquiti UniFi Dream Machine Pro as combined router/firewall; Ubiquiti UniFi 24-port PoE switch; Ubiquiti APs (U6 Lite or U6 Pro); APC Back-UPS 1500VA.
Mid (1,500–4,000 sq ft, 4–8 POS): Cisco Catalyst 8200 edge router with Cisco ISR firewall; Cisco Catalyst 1000 PoE switch; Ubiquiti U6 Enterprise APs; APC Smart-UPS 1500VA with SNMP card.
Enterprise small-store (4,000+ sq ft, 8+ POS): Cisco Catalyst 8300 SD-WAN router; Cisco Catalyst 9200 PoE switch; Cisco Catalyst 9130 APs; APC Smart-UPS 3000VA; Kisi cloud-based access control for the server-room door.
For physical access control to the IT closet itself, Kisi is the go-to for retail: it logs every entry with a timestamp, integrates with mobile credentials, and exports access logs for PCI audits without requiring a separate access-control server on-site.
Recommended logical topology:
The ISP demarc connects to the SD-WAN/edge router, which hands off to the firewall. The firewall feeds a single managed PoE switch. That switch carries four VLANs: POS (CDE scope, isolated), cameras, guest Wi-Fi, and management. APs run in FlexConnect or local-switching mode so that a WAN outage does not kill in-store Wi-Fi. The cellular modem connects to the router’s secondary WAN port for automatic failover. The NVR sits on the camera VLAN with no route to the POS VLAN.
The switch and router remain in PCI scope even with VLAN segmentation in place, because they carry CDE traffic. Document that explicitly in your network diagram for the assessor. For a deeper look at configuring this topology, the retail network setup guide covers VLAN configuration and firewall rules in detail.
How do you secure the server room against unauthorized access?
Physical security for the server room is not optional under PCI DSS — it is Requirement 9. A locked door is the baseline. Everything beyond that reduces insider risk and simplifies incident investigations.
Physical controls to implement:
Keyed or badge/keycode lock on the closet door (Kisi or equivalent for audit-log capability)
Tamper-evident panels on the rack (stickers that show if the rack has been opened)
CCTV camera covering the closet door exterior (on the camera VLAN, recorded to the NVR)
Lockable rack door if the rack is in a shared space
Access policy items:
Role-based access: only named IT staff and authorized vendors may enter
Written approval workflow for any vendor or contractor access
Access log reviewed monthly (Kisi exports this automatically)
Quarterly audit of who holds active credentials
Monitoring and logging:
Map which logs to retain: door-access timestamps, CCTV footage (minimum 30-day retention for PCI), switch port-security logs, and firewall authentication logs. Retail IT infrastructure management guidance recommends consistent governance frameworks (NIST, ITIL) to manage these logs across distributed store locations. Sosasolutionsnyc can centralize those alerts and access records for small retailers on a managed-service plan, so nothing falls through the cracks between store visits.
Pro Tip: Cross-reference door-access timestamps with CCTV footage timestamps weekly. If the logs show a badge entry at 11:47 PM but the camera shows no one entering, you have a credential-sharing problem or a hardware fault — both need immediate attention.
Fire detection and suppression for small server closets
A small IT closet does not need a full FM-200 suppression system by default — but it does need smoke and heat detection, and it needs the right type of portable extinguisher within reach.
Detection and suppression options:
Photoelectric smoke detector inside the closet (more sensitive to smoldering fires than ionization types)
Heat detector as a secondary sensor if the closet is dusty or prone to false alarms
Clean-agent portable extinguisher (CO2 or Halotron) rated for Class C (electrical) fires — never a water or dry-chemical extinguisher near live electronics
Hard-plumbed FM-200 or Novec 1230 system for larger closets or when local fire code requires it (check with your local fire marshal; requirements vary by jurisdiction and square footage)
The National Fire Protection Association’s NFPA 75 standard covers the protection of information technology equipment and is the reference local fire marshals use when evaluating IT room suppression requirements. Consult it before assuming a portable extinguisher is sufficient for your jurisdiction.
Safety steps:
Post a laminated emergency shutdown procedure on the inside of the closet door
Include the IT closet on the building’s fire evacuation plan and notify the building manager
Train at least two staff members on how to safely de-energize the rack before fire department access
Never prop the closet door open — a closed door slows fire spread and maintains cooling
How do you build redundancy and backups into a retail store?
Redundancy in a small retail store operates at three layers: power, connectivity, and data. Missing any one of them means a single failure takes the store offline.
Multi-layer redundancy plan:
Power: UPS bridges short outages (10–30 minutes) and enables graceful shutdown. APC Smart-UPS units with SNMP cards can trigger automated shutdown scripts before battery depletion.
Connectivity: Cellular failover (LTE or 5G modem on the router’s secondary WAN port) activates automatically when the primary ISP link drops. AWS edge computing patterns for retail show how local processing keeps POS and camera functions running during outages, syncing to cloud when connectivity returns.
Data: Local NVR retains camera footage (30-day minimum for PCI). Local POS database backups run nightly to an encrypted USB or NAS. Cloud backups (encrypted, AES-256) run on a scheduled sync for longer retention.
The Avolta retail edge compute case study demonstrates how retail-hardened edge platforms improve availability and reduce total cost of ownership across many locations — the same principle applies at the single-store level.
Numbered test schedule:
Weekly: Check UPS battery status via SNMP or management card dashboard. Verify cellular modem shows active registration.
Monthly: Simulate WAN failover by disconnecting the primary ISP link for 5 minutes. Confirm POS continues processing and cellular takes over within 60 seconds.
Quarterly: Restore a backup to a test environment and verify data integrity. Review access logs and CCTV retention.
Annually: Full UPS load test (most UPS management cards support this). Review and update the business-continuity runbook.
For guidance on managing distributed assets across multiple store locations, the retail IT asset management guide covers inventory and governance frameworks in detail.
PCI DSS compliance and network segmentation for retail stores
PCI DSS’s core principle for store-level compliance is scope reduction: the fewer systems that touch cardholder data, the smaller and cheaper the audit. Physical and logical separation of POS systems from everything else is how you achieve that.
The Cisco PCI Solution for Retail design guide provides validated architectures for exactly this: segmenting payment functions from other store services using VLANs, dedicated patch panels, and firewall rules. The PCI Security Standards Council specifies under Requirement 9 that physical access controls must protect all equipment that stores, processes, or transmits cardholder data.
PCI compliance checklist for small retail stores:
Locked IT closet with access log (Kisi or equivalent)
Separate patch panel ports or color-coded patch cables for POS VLAN (yellow)
VLAN segmentation: POS on its own VLAN with no route to guest Wi-Fi or back-office
Firewall rules: deny all traffic from POS VLAN to non-payment destinations; allow only to payment processor IPs
Strong logging: firewall logs, switch port-security logs, and door-access logs retained for 12 months
Documented network diagram showing CDE scope boundary
Quarterly vulnerability scans (ASV-approved scanner)
Annual penetration test if storing cardholder data locally
PCI Requirement | Store-Level Control |
Req. 9 (Physical security) | Locked closet, badge access, CCTV, tamper-evident panels |
Req. 1 (Network controls) | Firewall between POS VLAN and all other segments |
Req. 10 (Logging) | Firewall, switch, and door-access logs retained 12 months |
Req. 12 (Policy) | Written access policy, vendor approval workflow, annual review |
Step-by-step setup checklist with timeline and cost ranges
A typical small retail store IT closet build runs 3–6 weeks from site survey to handover. Here is the sequenced path:
Week 1: Site survey and design — Walk the store, map cable paths, confirm demarc location, photograph the proposed closet, and produce a rack elevation sketch and patch-panel map. Cost: $500–$1,500 (included in most managed-service engagements).
Week 1–2: Permitting and landlord sign-off — Submit electrical permit for the dedicated branch circuit. Get written landlord approval for conduit runs and any wall penetrations.
Week 2–3: Cabling — Run Cat6 drops during off-hours (evenings or before store open). Terminate, test, and label all runs. Cost: $1,000–$4,000 depending on drop count and conduit requirements.
Week 3–4: Equipment procurement and staging — Order rack, switch, router, UPS, PDU, and accessories. Stage and pre-configure equipment off-site when possible.
Week 4–5: Equipment installation — Mount rack, install devices per elevation plan, connect patch cables, power on, and verify all VLANs and firewall rules.
Week 5: Commissioning and testing — Test every drop with a cable certifier, verify VLAN segmentation, simulate WAN failover, confirm UPS runtime, and validate camera recording.
Week 6: Handover — Deliver documentation package: floor plan with cable paths, patch-panel map, rack elevation photos, test reports, access credentials, and monitoring onboarding.
For a broader view of managing the IT project timeline and vendor coordination, the retail IT project management guide covers stakeholder alignment and contractor scheduling.
Typical install durations and cost ranges:
Site survey to cabling complete: 2–3 weeks for a single small store
Equipment install and commissioning: 1–2 days on-site
Total project: 3–6 weeks
Low-tier total (basic wall-mount, minimal drops): $2,500–$4,500
Mid-tier total (12U rack, managed switch, UPS, 16 drops): $5,500–$10,000
High-tier total (full cabinet, SD-WAN, monitoring, 24 drops): $11,000–$19,000
Why these numbers and standards actually matter
The recommendations in this guide are not arbitrary. They trace back to published standards that auditors, inspectors, and insurers recognize.
The TIA’s cabling guidance sets the 90-meter copper distance limit that drives central placement decisions. The University of Texas at Dallas server-room standard formalizes space, clearance, and environmental targets that apply directly to small closets. The Cisco PCI Retail Design Guide translates PCI DSS into store-level network architecture. And Digital Realty’s retail datacentric architecture briefs show how store-level design connects to the broader omnichannel infrastructure that multi-location retailers depend on.
“Retail IT success depends on governance and tested business-continuity plans. NIST and CISA frameworks help structure security and continuity for distributed stores.” Standardized configurations and accurate asset inventories — as emphasized in retail IT infrastructure management guidance — are what separate stores that recover quickly from outages from those that lose hours of sales.
The 8U–12U rack size, the 12–24 Cat6 drop count, the 64.4°F–80.6°F temperature target, and the 90-meter cable limit are all grounded in those sources. When a contractor or assessor questions a design decision, you can point to the standard behind it.
What mistakes do retail server-room projects get wrong?
The most common error is picking a location based on convenience rather than cable geometry. A closet near the manager’s office sounds logical until you measure the cable path to the farthest POS terminal and find it’s 95 meters. Now you need a fiber run or a second switch, and the budget just grew by $2,000.
The second most common mistake is under-sizing the UPS. Retailers often buy a UPS rated for the switch alone, forgetting the PoE load powering 12 cameras and 6 APs. The UPS trips under load on day one.
Mixing POS and guest Wi-Fi on the same VLAN without firewall rules is the mistake that creates PCI scope problems. It happens more often than it should, usually because the person who set up the router was not thinking about PCI at all. A guest customer on your Wi-Fi should never be on the same broadcast domain as a POS terminal.
Skipping documentation is the mistake that costs the most over time. No patch-panel map means every troubleshooting call starts with someone tracing cables by hand. No rack elevation photo means the next technician spends 20 minutes figuring out what’s plugged into what. For a look at how these failures play out in real stores, the common retail IT failures guide covers the patterns and their fixes.
The single highest-impact first step: conduct a 2-hour site survey with a tape measure, a cable-path sketch, and a photo of the proposed closet and demarc location.
Sosasolutionsnyc handles the build so you can focus on the store
Retail store owners in New York and Florida have a direct path to a PCI-aware, fully documented server-room build without managing contractors, sourcing equipment, or deciphering PCI DSS on their own.
Sosasolutionsnyc’s store-opening IT solutions cover the full scope: site survey, rack design, cabling, equipment procurement, VLAN configuration, UPS sizing, environmental monitoring setup, and a complete handover documentation package. Every engagement includes network diagrams, patch-panel maps, and rack elevation photos — the exact materials a PCI assessor or future technician needs. For stores already open, the managed-service option adds 24/7 NOC monitoring, access-log centralization, and remote troubleshooting so small IT teams are not on call around the clock. Request a site survey to get a scoped proposal for your location.
Primary sources and further reading
These sources underpin the recommendations throughout this guide. Each one is publicly available and worth bookmarking for your assessor or contractor.
Telecommunications Industry Association (TIA) — Sets the 90-meter copper Ethernet distance limit that drives central equipment placement decisions.
Cisco PCI Solution for Retail Design Guide — Validated store-level network architecture for PCI DSS compliance and scope reduction.
Cisco Validated Profile — Retail Non-Fabric SD-WAN — Small-branch topology and WAN redundancy patterns for retail stores.
PCI Security Standards Council (PCI SSC) — Primary source for PCI DSS requirements, including Requirement 9 on physical access controls.
CrimpShop — Retail Store Network Installation Guide — Practical cabling template with 12–24 Cat6 drop recommendations by device type.
AWS — Edge Computing in Retail — Reference architecture for local processing and cloud sync during connectivity outages.
Vertiv — Optimizing Retail Efficiency with Micro Data Centers — Integrated power and cooling solutions for constrained retail footprints.
Scale Computing — Avolta Retail IT Modernization — Case study on retail-hardened edge compute for high availability across many locations.
Digital Realty — Retail Datacentric IT Architecture — How store-level design connects to omnichannel and low-latency cloud exchange.
Sources
Recommended
Comments