Digital Signage Deployment: Enterprise & Retail Playbook
- Sosa Solutions NYC
- Aug 14
- 18 min read
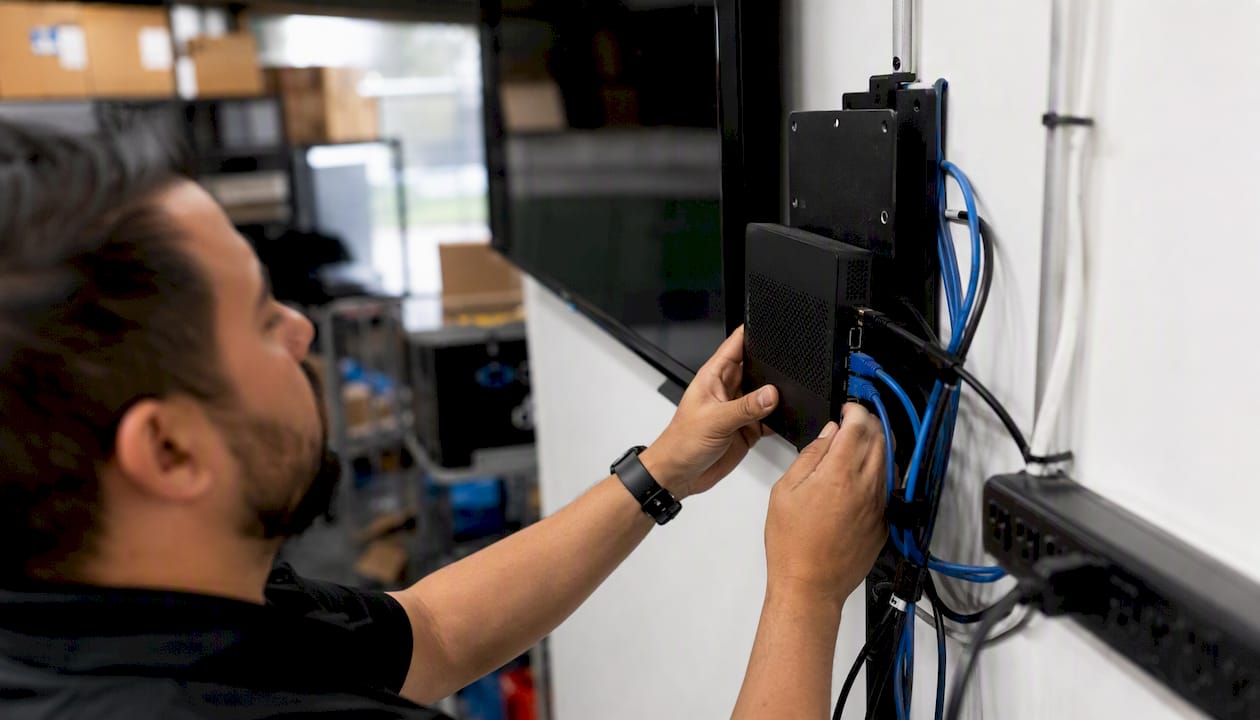
Treat digital signage deployment as a staged program: plan, pilot, standardize, then scale. That sequence prevents the three most common failure modes: scope creep from skipped site surveys, network surprises that stall installation day, and hardware fragmentation that multiplies your support burden across sites.
Before anything else, assign these tasks for the next two weeks:
Run a site survey at every candidate location. Confirm power availability, network drops, mounting surfaces, sightlines, and ambient light before you write a single RFP line.
Select two to four pilot sites that represent your range of conditions (high-traffic vs. low-traffic, indoor vs. outdoor, new build vs. retrofit).
Lock your network architecture. Request a dedicated signage VLAN and document firewall outbound rules for your CMS and CDN domains before installation day.
Draft a procurement checklist. Align on display type, media player platform, and CMS before you solicit quotes so bids are comparable.
Identify a project owner. Someone in IT must own the deployment program, not just the hardware ticket.
Skipping any one of these steps is how a 10-screen pilot turns into a six-month delay.
Key Takeaways
A successful digital signage deployment requires a staged program model: plan, pilot, standardize, and scale, with site surveys, network segmentation, and stakeholder alignment completed before any hardware is ordered.
Point | Details |
Stage the program | Run plan, pilot, standardize, and scale in sequence to prevent scope creep and hardware fragmentation. |
Site survey first | A pre-bid site survey is the single highest-ROI step; it locks scope and makes installer quotes comparable. |
Dedicate the network | Put signage players on a separate VLAN with an outbound allowlist; wired Ethernet for all permanent installs. |
Standardize hardware | A single display family and media-player platform reduces spare-parts complexity and support costs at scale. |
Sosasolutionsnyc | Manages site surveys, network prep, staging, installation, and SLA-backed monitoring for retail deployments in New York and Florida. |
Table of Contents
Site survey and rollout planning: what to check before you scope quotes
How do you set up networking and security for signage devices?
How Sosasolutionsnyc runs enterprise digital signage deployments
How do you protect content and configurations from system failures?
How does digital signage integrate with your existing IT systems?
Sosasolutionsnyc handles your signage rollout from survey to go-live
What is a digital signage network and how does it work?
A digital signage network is the combination of hardware, software, and connectivity that delivers managed content to displays across one or more locations. The core components are:
Display: The screen itself, ranging from a single 43-inch wall mount to a multi-panel video wall.
Media player: The compute device that caches and renders content. This can be a standalone box player, a dongle, or a System-on-Chip (SoC) built into the display.
Content Management System (CMS): The cloud or on-premises platform where content is uploaded, scheduled, and pushed to players.
Content: The actual creative assets, including images, video, HTML5 widgets, and live data feeds.
Network and switching: The infrastructure that connects players to the CMS and CDN for content delivery and remote management.
Mounting and power: Structural and electrical infrastructure that keeps displays positioned and running.
The flow looks like this: content is uploaded to the CMS, which pushes it through a CDN to the player’s local cache. The player renders content on the display on the schedule you set, independent of a live internet connection once cached. That local caching is what keeps screens running even during brief network outages.
Real-world use cases:
Retail menu boards: A quick-service restaurant chain runs dayparted menus, switching from breakfast to lunch items automatically at 10:30 AM across 40 locations.
In-store campaign displays: A fashion retailer pushes promotional content to window-facing screens from a single CMS dashboard, updating all 15 stores in under five minutes.
In-branch information screens: A bank branch uses lobby displays for rate updates, wait-time queues, and emergency messaging, all managed remotely by a single IT administrator.
Pro Tip: A digital signage network’s objectives should be defined before you choose hardware. Common goals include informing audiences, reducing printed materials, enabling real-time updates, and creating branded advertising space. Locking those objectives first prevents over-specifying hardware for a use case that only needs a basic player.
How do you set goals and KPIs for a signage deployment?
Vague goals produce vague pilots. Before you approve hardware spend, map each strategic objective to a measurable KPI and a data source.
Common strategic goals include brand impact, sales lift, operational information delivery, wayfinding, and emergency messaging. Each one requires a different measurement approach.
A few practical notes on instrumentation: CMS analytics will give you play counts and scheduling compliance out of the box. Sales lift requires a POS integration or a controlled A/B test comparing promoted vs. non-promoted periods. Footfall sensors are a separate hardware investment; if you don’t have them, use transaction counts as a proxy. Most teams discover analytics gaps during the pilot, which is exactly when you want to find them.
Site survey and rollout planning: what to check before you scope quotes
A pre-bid site survey is the highest-ROI step in any deployment. It surfaces the variables that drive cost variance between installer quotes and prevents change orders mid-project. According to a signage installation guide, a complete installation covers six distinct jobs: site prep, mounting, cabling, power, player setup, and testing. Every one of those jobs has cost variables that only a physical survey can reveal.
Site survey checklist:
Power: Is a dedicated circuit available within 10 feet of the mount point? Is the panel capacity sufficient?
Network: Is a wired Ethernet drop present, or does one need to be run? What switch port is available?
Mounting surface: Is the wall concrete, drywall, or glass? What is the load rating?
Sightlines: What is the primary viewing angle and distance? Are there obstructions (columns, shelving, glare sources)?
Ambient light: Does direct sunlight hit the display surface? What brightness rating does that require?
ADA and accessibility: Does the mount height and placement comply with ADA guidelines for public-facing displays?
Permits: Does the jurisdiction or building management require permits for electrical work or structural mounting?
Use the survey output to lock scope before you send RFPs. Installers who quote without a survey will pad their bids or hit you with change orders. Installers who quote from a completed survey give you comparable, defensible numbers.
Deployment timeline by scale (based on phased deployment guidance):
Deployment Size | Estimated Timeline |
1–10 screens | 3–5 weeks |
10 to 50 screens | 8–15 weeks |
50+ screens | 15-plus weeks |
Pilot selection criteria: choose sites that represent your hardest installation conditions, not your easiest. A pilot that only tests simple installs will not surface the network or mounting surprises that appear at scale.
How should you choose displays, mounts, and media players?
Hardware decisions made in the planning phase echo through the entire lifecycle of the deployment. Getting them wrong means higher support costs, shorter replacement cycles, and compatibility headaches at scale.
Displays:
Consumer vs. commercial-grade: Consumer TVs are rated for 8–12 hours of daily use. Commercial displays are rated for 16/7 or 24/7 duty cycles and carry longer warranties. For any permanent retail or enterprise install, commercial-grade is the correct choice.
Brightness: Indoor displays typically need 400–700 nits. Window-facing or semi-outdoor displays need 2,500–3,500 nits. Direct-sun outdoor displays require 5,000+ nits.
IP ratings for outdoor signage: Look for IP65 or higher for enclosures exposed to rain or dust. Outdoor digital signage tips consistently point to thermal management as the failure point most teams underestimate.
Media players:
Dongle players (stick-form-factor) are low-cost and easy to swap, but they run warm and have shorter lifespans in 24/7 environments.
Box players offer more processing power, better thermal management, and longer service lives. They are the right choice for video walls, 4K content, or high-uptime requirements.
SoC (System-on-Chip) displays have the player built in, which reduces cabling complexity but ties your player lifecycle to your display lifecycle.
One player per screen is the standard. Shared players driving multiple outputs introduce single points of failure and complicate content scheduling.
Mounting:
Wall mounts, ceiling drops, recessed enclosures, and video wall alignment frames each have different structural requirements. Confirm load ratings with a facilities team before finalizing mount specs. For video walls, alignment tolerances are tight: even a 2mm gap between panels is visible at close range.
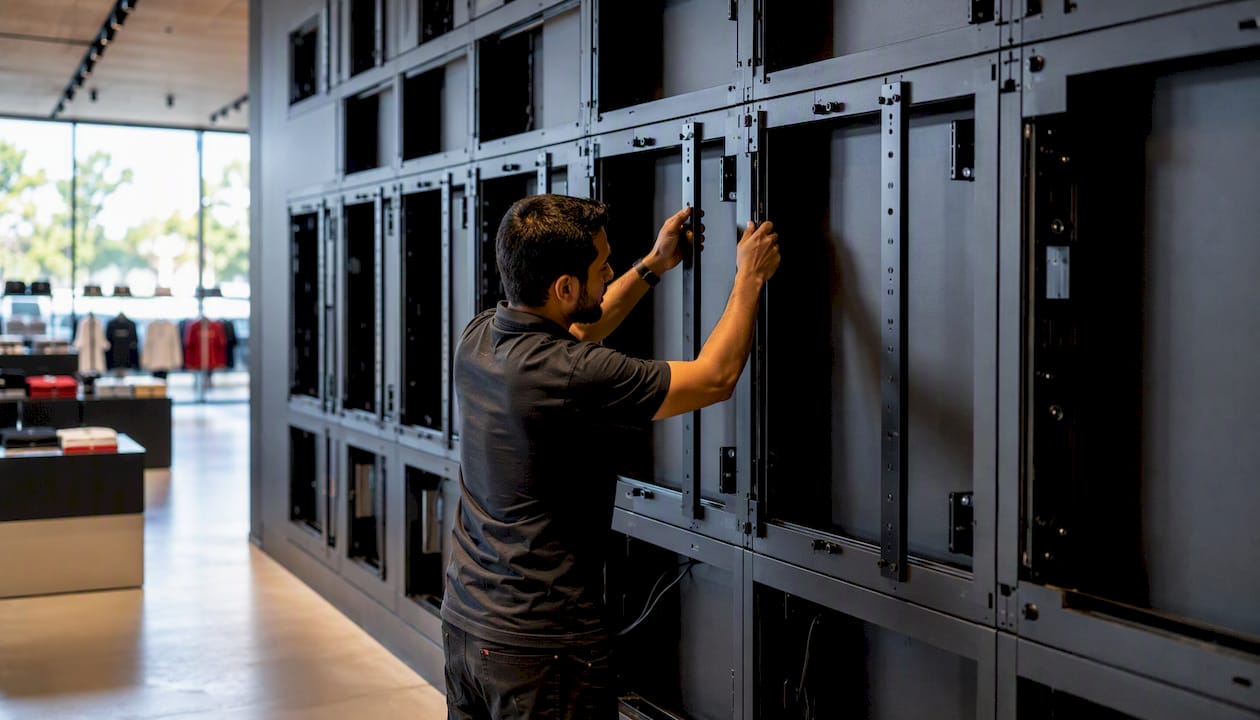
Pro Tip: Standardize on a small family of display models and a single media-player platform across your deployment. The support cost reduction at 50+ screens is significant: fewer firmware variants, a single spare-parts inventory, and faster technician training.
What CMS features should you require in an RFP?
The CMS is where your operations team lives every day. A platform that looks good in a demo but lacks remote management or offline caching will cost you in support hours within 90 days of launch.
Core features to require:
Device enrollment and registration (ideally with certificate or token-based pairing)
Scheduling and dayparting (time-of-day, day-of-week, date-range triggers)
Playlist management with content rotation and priority rules
Tagging and grouping for multi-site targeting (push content to “all New York stores” without manual selection)
User roles and permissions (content editors should not have access to network settings)
Remote screenshot and remote reboot from the CMS dashboard
Offline caching so screens continue playing during brief network outages
Sync play for video walls or multi-screen installations requiring frame-accurate playback
API integrations for POS data, weather feeds, or inventory systems
Some CMS platforms support broad hardware compatibility and simple pairing workflows, which reduces on-site technician time during enrollment. Evaluate platforms on how they handle a content push to 50 devices simultaneously: does it queue gracefully, or does it saturate your network?
RFP acceptance test checklist (numbered for sign-off):
Register a new device from factory reset in under five minutes using the enrollment workflow.
Push a content update to all enrolled devices and confirm delivery within your defined SLA window.
Trigger a remote reboot from the CMS dashboard and confirm the device comes back online and resumes playback.
Simulate a network outage: disconnect the player for 30 minutes, reconnect, and verify content resumes without manual intervention.
Confirm sync play accuracy across two or more screens to within one frame.
For cloud vs. on-premises CMS: cloud platforms reduce infrastructure overhead and simplify multi-site management. On-premises deployments give you data sovereignty and can operate without internet access, which matters for certain regulated environments. Most enterprise retail deployments use cloud CMS with a CDN layer for content distribution. A well-organized content library with tagging and versioning is worth evaluating as part of your CMS selection criteria.
How do you set up networking and security for signage devices?
Signage players are internet-connected endpoints. Without proper segmentation, a compromised player can become a lateral movement vector into your corporate network. The fix is straightforward, but it requires IT involvement before installation day.
Network checklist:
Dedicated signage VLAN, isolated from corporate and POS networks
DHCP scope sized for your device count plus 20% headroom
DHCP reservations or static assignments for each player (simplifies troubleshooting)
Firewall outbound allowlist: CMS domain, CDN domains, NTP server, DNS resolver
No inbound rules required for most cloud CMS architectures
Wired Ethernet for all permanent installs; Wi-Fi only for temporary or retrofit locations where cabling is not feasible
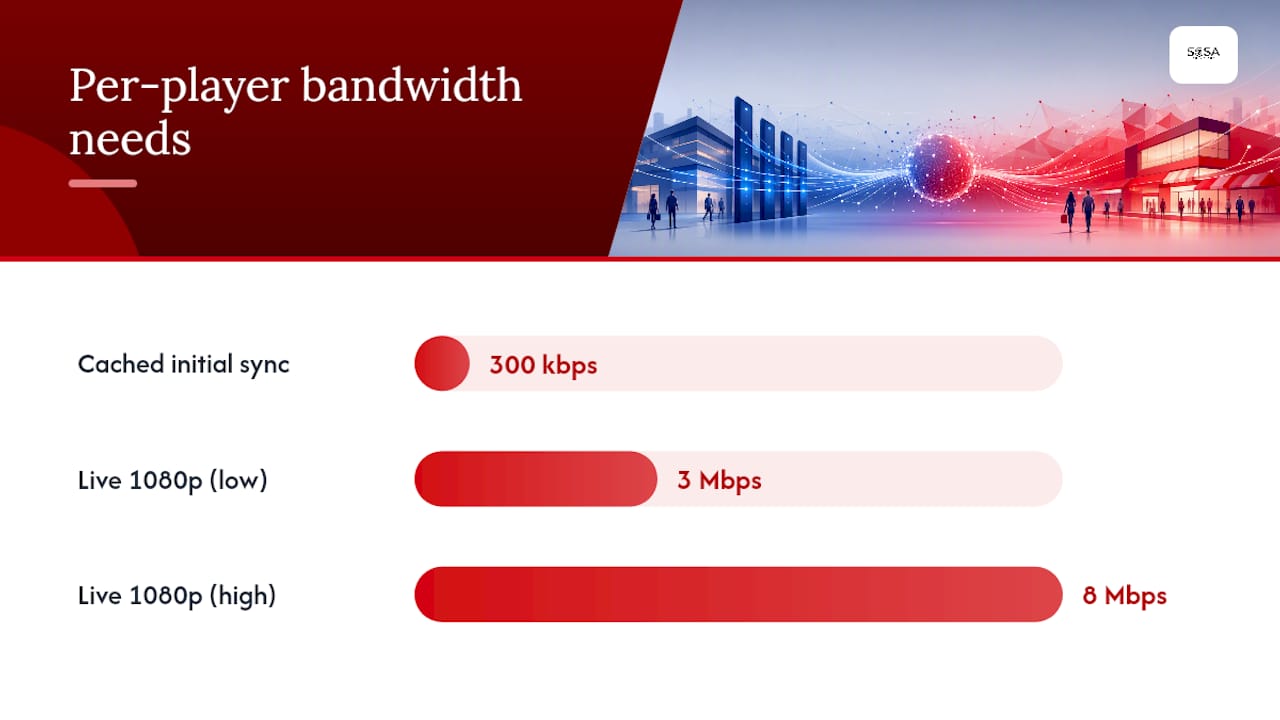
For digital signage networking, bandwidth calculation depends on whether your content is cached or live. Cached media (pre-downloaded video and images) requires only enough bandwidth for the initial sync, typically a few hundred kilobits per second per player during off-hours. Live streams require sustained bandwidth for every concurrent stream: a 1080p live stream at H.264 runs roughly 3–8 Mbps per player. Size your uplink accordingly.
One often-missed constraint: PoE switch budget. If you are powering players or ancillary devices over PoE, calculate your per-switch wattage early. A 400W PoE budget across 48 ports supports roughly 26 ports at 15W each. Running out of PoE budget mid-installation is an avoidable delay. For deeper reading on switch capacity planning, the retail IT infrastructure guide covers VLAN design and PoE budgeting in a retail context.
Authentication and device hardening:
Enroll players using certificate or token-based pairing rather than shared passwords
Integrate players into your endpoint management platform where possible. Microsoft Intune, for example, documents device enrollment fundamentals that apply directly to managing signage players at enterprise scale
Define a patch and firmware update policy before go-live, not after
Disable unused ports and services on each player
Pro Tip: Use VLAN segmentation combined with an outbound allowlist rather than open internet access. This limits lateral movement if a player is compromised and gives you a clean audit trail of what each device communicates with. Require your CMS vendor to provide a complete domain allowlist before procurement.
How do you stage, install, and run a pilot?
The install sequence matters. Teams that skip pre-staging show up on installation day with unconfigured players and spend half the day on enrollment tasks that should have been done at the bench. According to a complete installation guide, many small deployments can be completed in an afternoon per screen when pre-staging is done correctly.
Pre-staging checklist (done at the bench before site visit):
Flash or verify the correct firmware version on each player.
Enroll each device in the CMS and assign it to the correct site group.
Preload a test playlist and verify local cache.
Label and asset-tag each player with its assigned location and display ID.
Verify network access using a test VLAN on the bench.
Pack a spare player, spare HDMI cable, and mounting hardware for each installation team.
Installation day sequence:
Mount the display and verify structural integrity.
Run and terminate cabling (power, Ethernet, HDMI).
Connect and power on the media player.
Verify HDMI handshake and display resolution.
Confirm network connectivity and CMS check-in.
Verify content playback from the preloaded playlist.
Run scheduling tests: confirm daypart triggers fire at the correct time.
Document the install with photos of the mount, cable routing, and player location.
Pilot handover items:
CMS credentials and device group assignments
Network documentation (VLAN ID, IP reservations, firewall rules)
Warranty information and spare parts inventory
Maintenance contact list and escalation path
Training schedule for content operators
Content strategy: playlists, creative specs, and governance
Content is where most deployments underperform after launch. The hardware works. The network is stable. But the screens show outdated promotions or misformatted assets because no one owns the content workflow.
Playlist and dayparting best practices:
Keep individual content items to 10–15 seconds for high-traffic environments where dwell time is short.
Use dayparting to match content to audience: morning commuters see different messaging than afternoon shoppers.
Limit playlist length to what a viewer can realistically see in one visit. A 40-item playlist in a 5-minute dwell environment means most content never gets seen.
Define a fallback content item (branded loop or static image) that plays if a scheduled item fails to load.
Creative specifications:
Resolution: 1920x1080 for standard HD, 3840x2160 for 4K displays. Confirm with your CMS what resolutions it transcodes vs. passes through natively.
Codec: H.264 MP4 for video is the most broadly compatible format across player hardware.
Safe zones: keep critical text and logos at least 5% inset from all edges to account for display overscan.
File size budget: most players handle files up to 500MB without issues; check your CMS’s per-file and per-playlist limits.
Always test assets on actual hardware before approving them for production. A file that looks correct in a browser preview may render differently on a commercial display.
Governance:
Assign a named content owner for each site or region. Define an approval workflow with a maximum turnaround time (24 hours is a common SLA for routine updates). Use CMS tagging to version content by campaign, date, and location so rollbacks are fast. For retail teams using screens as a sales enablement channel, a clear approval workflow also prevents unauthorized promotional content from going live.
Maintenance, monitoring, and support after launch
A signage network that runs without monitoring is a network you find out is broken when a customer tells you. Define your monitoring scope and SLA tiers before go-live.
Monitoring scope:
Device uptime: is the player online and checking in with the CMS?
Content playback verification: is the correct content playing on schedule?
CMS sync health: are content updates reaching devices within the defined SLA window?
Network metrics: packet loss, latency, and bandwidth utilization on the signage VLAN
Example SLA tiers:
P1 (all screens at a location dark): 2-hour response, 4-hour resolution target
P2 (single screen down, others operational): 4-hour response, next-business-day resolution
P3 (content update delayed, screens operational): Next-business-day response, 48-hour resolution
Manage vs. outsource decision criteria:
Manage in-house if you have dedicated IT staff with regional coverage, a spare parts inventory, and a CMS administrator on staff.
Outsource if your deployment spans multiple states, your IT team lacks signage-specific experience, or your SLA requirements exceed what internal staffing can support.
Maintenance schedule:
Daily: Review CMS dashboard for offline devices; verify overnight content updates pushed correctly.
Weekly: Check network metrics on the signage VLAN; review any P2/P3 tickets from the prior week.
Monthly: Audit content for expired or outdated items; verify firmware versions against the vendor’s current release; test remote reboot on a sample of devices.
What do digital signage deployments actually cost?
Budget ranges vary significantly by deployment type, and procurement teams that don’t account for all cost drivers end up with approval gaps mid-project.
Primary cost drivers:
Commercial displays (hardware cost per unit)
Media players (if not SoC)
Mounts, brackets, and cabling materials
Electrician labor and permits (often underestimated)
Installation labor
CMS license (per-player, per-site, or enterprise seat)
Project management overhead (budget 10–15% of total project cost)
Installation labor alone ranges from a few hundred dollars for a single indoor display to several thousand dollars per location for multi-site rollouts, depending on complexity. Outdoor and structural installs sit at the higher end of that range. These figures come from installation cost guidance and reflect U.S. market rates.
Sample timeline by deployment size:
Licensing models: Per-player monthly fees are the most common CMS pricing model. Per-site licensing makes sense when you have many screens per location. Enterprise seat licensing is worth negotiating for deployments above 100 players. Watch for surprise recurring fees: content storage overages, API call limits, and support tier upgrades are the most common budget surprises after year one.
Deployment checklist: phases, owners, and sign-off criteria
Use this checklist as a starting point for your project-tracking tool. Assign an owner to each item before kickoff.
Phase 1: Planning
Define strategic goals and KPIs (Owner: IT + Marketing)
Complete site surveys for all candidate locations (Owner: IT + Facilities)
Select pilot sites (Owner: IT lead)
Finalize hardware specifications (Owner: IT)
Issue RFP and select CMS vendor (Owner: IT + Procurement)
Confirm network architecture: VLAN, firewall rules, bandwidth (Owner: IT)
Sign-off criteria: site surveys complete, hardware and CMS vendor selected, network design approved
Phase 2: Pilot
Stage and enroll pilot devices (Owner: IT)
Install pilot sites and run acceptance tests (Owner: IT + Installer)
Train content operators on CMS (Owner: IT + Marketing)
Collect KPI data for 2–4 weeks (Owner: IT + Marketing)
Sign-off criteria: all acceptance tests passed, KPIs trending toward targets, operator training complete
Phase 3: Rollout
Execute phased installation by wave (Owner: IT + Installer)
Monitor CMS and network health per wave (Owner: IT)
Conduct post-installation audits at each site (Owner: IT + Facilities)
Sign-off criteria: all sites live, monitoring dashboards active, SLA documentation signed
Phase 4: Optimization
Review KPI performance against targets (Owner: IT + Marketing)
Audit content for expired or underperforming items (Owner: Marketing)
Update firmware and CMS platform (Owner: IT)
Sign-off criteria: KPI review complete, content library current, maintenance runbook updated
How Sosasolutionsnyc runs enterprise digital signage deployments
Large-scale rollouts fail when treated as one-time installations rather than structured programs. Enterprise deployment frameworks consistently show that defined ownership roles and a phased governance model are what separate successful programs from stalled ones.
Sosasolutionsnyc approaches digital display deployment as a managed program, not a single project. The service scope covers:
Pre-deployment site surveys across New York and Florida locations
Network preparation: VLAN design, firewall rule documentation, PoE capacity review
Bench staging and CMS enrollment before any installer sets foot on site
Coordinated installation scheduling with regional coverage
Post-installation monitoring with defined SLA tiers
Ongoing managed IT support for the signage network
For readers ready to move from planning to execution, the store opening IT solutions page outlines how Sosasolutionsnyc structures managed deployments and what to prepare for a scoped engagement.
How do you protect content and configurations from system failures?
Disaster recovery for digital signage is simpler than most IT teams expect, but it requires deliberate setup before something breaks.
Content backup:
Store all master content assets in a cloud repository (not just in the CMS). If your CMS provider has an outage or you need to migrate platforms, you need source files that are independent of the CMS.
Version control your content library. Tag each asset with campaign name, date, and location group so you can restore a prior state quickly.
For guidance on cloud backup practices in a retail context, the cloud backup for retail guide covers storage strategies that apply directly to signage content libraries.
System configuration backup:
Export CMS device configurations, playlist assignments, and scheduling rules on a regular cadence (weekly for active deployments, monthly for stable ones).
Document network configurations: VLAN IDs, DHCP reservations, firewall rules, and player IP assignments. Store this documentation in a location accessible to your IT team without requiring CMS access.
Keep at least one pre-staged spare player per 10 deployed units. A spare that is already enrolled in the CMS and loaded with a default playlist can replace a failed unit in under 30 minutes.
Recovery procedures:
Define a recovery runbook that covers three scenarios: single player failure, CMS outage, and network outage. Each scenario has a different response path.
Test the recovery runbook at least once per quarter. A runbook that has never been tested is a document, not a plan.
How does digital signage integrate with your existing IT systems?
Signage does not operate in isolation. The most useful deployments pull live data from business systems and push performance data back to analytics platforms.
Common integration points:
POS systems: Pull real-time pricing, inventory levels, or promotional triggers to update content automatically. This is particularly valuable for retail menu boards and promotional displays.
ERP and inventory systems: Display live stock levels or product availability on in-store screens without manual content updates.
HR and internal communications platforms: Push shift schedules, safety notices, or internal announcements to employee-facing screens.
Wayfinding and directory systems: Integrate with building management or room-booking platforms for dynamic wayfinding displays.
Analytics and BI platforms: Export CMS play logs and uptime data to your existing reporting stack for unified performance dashboards.
Integration approach:
Most enterprise CMS platforms expose REST APIs for content triggering and device status. Before finalizing your CMS selection, confirm that the API documentation covers your specific integration use cases and that your internal development team or IT partner can support the integration build. For multi-location retail environments, the retail store IT infrastructure guide covers network design patterns that support these integrations cleanly.
Authentication between the CMS API and your business systems should use service accounts with scoped permissions, not shared admin credentials. Document every integration dependency so that a CMS platform migration does not silently break a live data feed.
Training plans for operators and content managers
A well-deployed network with undertrained operators degrades quickly. Content goes stale, scheduling errors go unnoticed, and IT gets pulled into tasks that marketing should own.
Training structure:
CMS administrator training (IT team): covers device enrollment, network troubleshooting, remote reboot, firmware updates, and user management. This session should be hands-on with actual enrolled devices, not just a vendor demo.
Content operator training (marketing or store managers): covers playlist creation, scheduling, asset upload, tagging, and the approval workflow. Keep this session under two hours and provide a written quick-reference card.
Facilities and installation team briefing: covers physical maintenance tasks, how to identify a failed player vs. a display issue, and the escalation path for hardware problems.
Ongoing training:
Schedule a refresher session 60–90 days after go-live, when operators have real questions from daily use.
Document common tasks as short video walkthroughs stored in a shared drive. Turnover in retail environments is high; a five-minute video is more durable than a one-time training session.
When the CMS platform releases a major update, run a 30-minute update briefing before the update goes live in production. Surprises in the CMS interface cause content errors.
What most deployment guides get wrong
The conventional wisdom on digital signage deployment focuses on hardware specs and CMS feature lists. Those matter, but they are not where deployments fail.
Most failures trace back to one of four mistakes: no site survey, mixed hardware families, inadequate network segmentation, and missing stakeholder alignment before procurement. The hardware and software decisions are actually the easy part once those four are resolved.
The one that surprises teams most is stakeholder alignment. IT procures the hardware. Marketing owns the content. Facilities manages the physical space. Finance approves the budget. None of them have the same definition of “done.” A deployment that IT considers complete (screens are on, CMS is live) is not complete from marketing’s perspective (no approved content, no trained operators) or facilities’ perspective (no maintenance runbook, no spare parts). The handover gap between IT and operations is where most post-launch problems originate.
The practical fix: run a kickoff meeting with all four stakeholders before the site survey. Agree on a shared definition of “live” that includes content readiness, operator training, and a maintenance plan, not just hardware installation. That one meeting prevents more problems than any technical checklist.
One immediate action you can take this week: draft a one-page deployment scope document that defines what “done” means for each stakeholder group and circulate it for sign-off before procurement begins.
Sosasolutionsnyc handles your signage rollout from survey to go-live
Planning a digital signage deployment across multiple retail locations in New York or Florida means coordinating site surveys, network prep, hardware procurement, installation scheduling, and CMS enrollment simultaneously. That is a full program management workload on top of your existing IT responsibilities.
Sosasolutionsnyc manages the entire deployment program for retail and enterprise clients: pre-deployment site surveys, VLAN and firewall configuration, bench staging and CMS enrollment, coordinated regional installation, and SLA-backed monitoring after go-live. Pricing varies by deployment size and scope; the right starting point is a scoped quote based on your site survey results.
To get started, visit the store opening IT solutions page and request a consultation. Bring your site list, your target go-live date, and your CMS shortlist. Sosasolutionsnyc will scope the engagement and identify the fastest path from pilot to full rollout.
Sources
Note on vendor-specific domain allowlists: before finalizing CMS procurement, request a complete list of domains your shortlisted platforms require for outbound firewall rules. This list varies by vendor and is rarely published in standard documentation. Get it in writing before you configure your firewall policy.
Recommended
Comments