Label Printer Setup: Get a Test Label in 15–30 Minutes
- Sosa Solutions NYC
- Aug 13
- 13 min read
You can have a working label printer producing a verified test label in a quarter to half an hour by following this sequence: download the driver, position and power the printer, connect the interface cable, load media, run calibration, and then print a configuration label. That order matters. Skip calibration and you get misaligned labels. Skip the driver install and Windows flags the device as “Unspecified.” The steps below walk you through each phase in plain terms. If you hit network provisioning issues, repeated calibration failures, or need to integrate with a POS system for a store opening, that’s the point to call a pro like Sosasolutionsnyc rather than burn an afternoon on it.
Key Takeaways
A correct label printer setup follows a strict sequence: driver first, then hardware connection, then media loading, calibration, and a verified test print.
Point | Details |
Driver-first install | Install the manufacturer driver before connecting USB to prevent “Unspecified device” errors in Windows. |
Calibrate before printing | Run model-specific calibration so the printer detects label gaps or black marks and feeds correctly. |
Static IP for retail networks | Use a static IP or DHCP reservation to prevent intermittent POS connectivity failures from address changes. |
Match media to printer type | Pairing direct-thermal labels with a thermal-transfer printer accelerates printhead wear and raises maintenance costs. |
Sosasolutionsnyc for store openings | Sosasolutionsnyc provides on-site driver install, calibration, network provisioning, and POS integration across New York and Florida. |
Manufacturer support pages and vendor utilities
Use these resources for model-specific driver downloads, firmware, and setup documentation:
Zebra Setup Utilities (ZSU): The primary tool for driver install, network provisioning, and firmware management on Zebra printers. Keep it on every host machine that connects to a Zebra device.
ZDesigner drivers: Model-specific Windows drivers for Zebra desktop and industrial printers. Always match the driver to the exact model string and OS build.
ZT231 Quick Start Guide: Covers media loading, ribbon loading, calibration sequences, and driver install order for the ZT231 series.
Zebra desktop printer initial setup (article 000034751): Step-by-step hardware and host-system setup phases for ZD411 and similar desktop models.
HPRT thermal label printer setup guide: Practical walkthrough for consumer and small-desk HPRT models covering driver download, ribbon loading, and test print steps.
Flowhub Windows label printer setup: Documents the standard Windows workflow for adding a label printer via Devices & Printers and setting Printing Preferences to match label dimensions.
Print a network configuration label and a configuration report after every setup. Those two printouts confirm the printer’s settings without requiring a host connection and serve as the baseline reference for any future troubleshooting.
Table of Contents
How do you set up a label printer from scratch?
Physical setup is where most people rush and regret it. A few minutes here prevents feeding errors and printhead damage later.
Unboxing and placement checklist:
Remove all transit tape, foam inserts, and protective film, including any stickers covering the media sensor window.
Confirm the box includes a power supply (or power cord), interface cable if bundled, and any quick-start documentation.
Set the printer on a stable, flat surface away from direct sunlight and heat sources. Thermal printheads are sensitive to ambient temperature swings.
Plug into a grounded outlet. Avoid power strips shared with high-draw equipment like space heaters.
Keep the printer within a short cable run of the host computer or network drop. A coiled or overly long USB cable can cause intermittent communication errors.
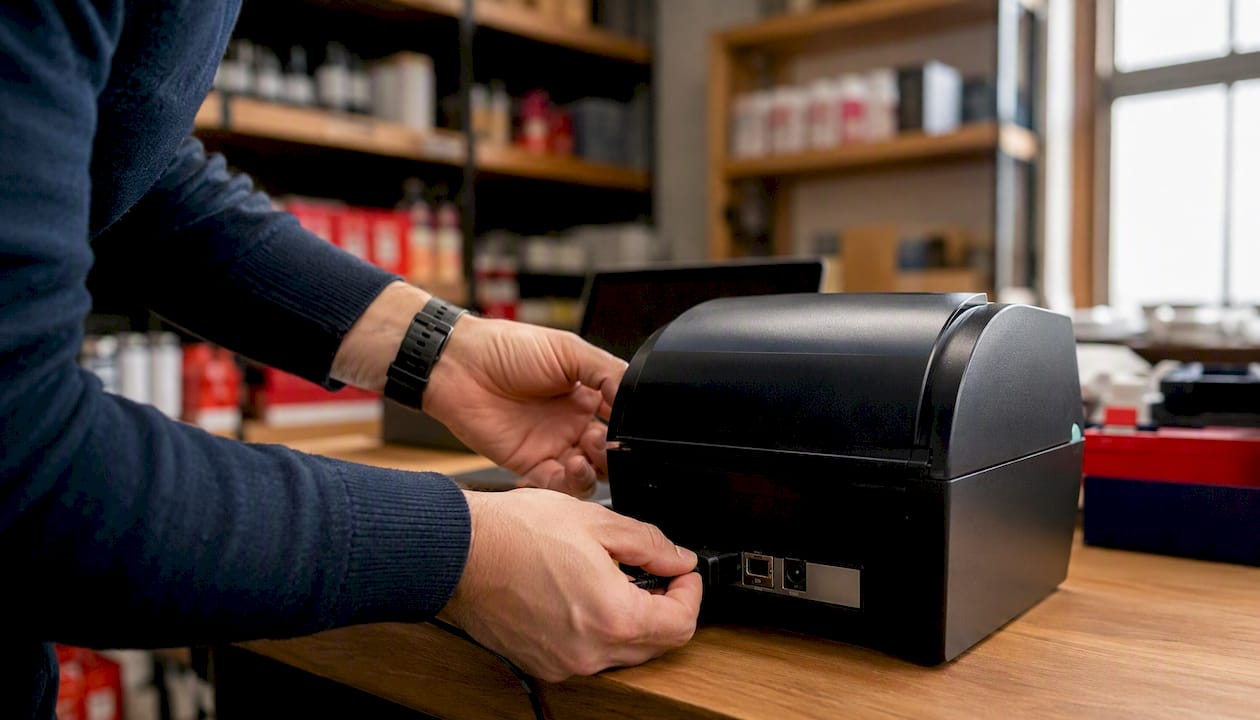
Connect power before the interface cable. Most manufacturers, including Zebra, want the printer powered and initialized before you attach USB. The Zebra GK420T setup overview specifically recommends having drivers and supplies ready on the host before applying power to the device.
Direct thermal vs. thermal transfer: Identify your printer type before loading anything. Direct thermal printers use heat-sensitive labels and need no ribbon. Thermal-transfer printers use a ribbon to transfer ink onto the label stock. Using direct-thermal labels in a thermal-transfer printer, or the reverse, shortens printhead life and drives up maintenance costs. Check the model number on the back panel if you are unsure.
Safety note: The printhead gets hot during operation. Let it cool before touching it. If you are working in a carpeted area, ground yourself before handling the printhead or internal components to avoid electrostatic discharge damage.
Pro Tip: Keep a spare USB cable and a short Cat5e patch cable on hand. Interface cables are the most common overlooked item during a store-opening setup, and running out to buy one costs more time than it costs money.
What is the right way to install a label printer driver on Windows?
Install the driver before you plug in the USB cable. This is not optional advice. Zebra’s support documentation is explicit: connecting the device before the driver is installed causes Windows to register it as an “Unspecified device,” which then requires a full driver removal and reinstall to fix. The same guidance applies to HPRT desktop models.
Step-by-step driver install:
Go to the manufacturer’s support page and download the correct driver for your model and OS build. For Zebra printers, this means the ZDesigner driver package or Zebra Setup Utilities (ZSU), which bundles the driver with configuration and diagnostics tools. For HPRT models, download from the HPRT support portal.
Confirm you are downloading the Windows 10/11 x64 version. A 32-bit driver on a 64-bit system causes silent failures.
Run the installer. Accept the driver publisher prompt when Windows asks. Do not skip it or the driver will not install correctly.
When the installer wizard completes and prompts you to connect the printer, do so then, not before.
Open Devices & Printers (or Printers & Scanners in Windows 11 Settings). The printer should appear by name. If it shows as “Unspecified,” the driver did not install correctly before connection.
After the printer appears, right-click it, choose Printing Preferences, and set the label width and length to match your physical media. A mismatch here causes every label to print offset or cut mid-image.
For network-capable printers, Zebra Setup Utilities can also install a TCP/IP port and create a LAN port using the printer’s IP address, so the host can send jobs over the network without a USB connection. Details on that workflow are in the ZSU network install guide.
Pro Tip: Match the driver’s DPI setting and exact model string to your hardware. A ZD421 driver will not behave correctly on a ZD411. Keep ZSU installed on the host machine even after setup. You will want it for firmware updates and network reprovisioning.
Skipping driver pre-installation is the single most common cause of label printer setup failures in Windows environments. Fixing an “Unspecified device” error after the fact takes longer than doing the driver-first install correctly the first time.
How do you load label media and ribbon correctly?
Loading media wrong is the second-fastest way to waste an afternoon. The steps below apply broadly to desktop thermal printers; always cross-reference your model’s quick-start guide for spindle orientation specifics.
Media loading checklist:
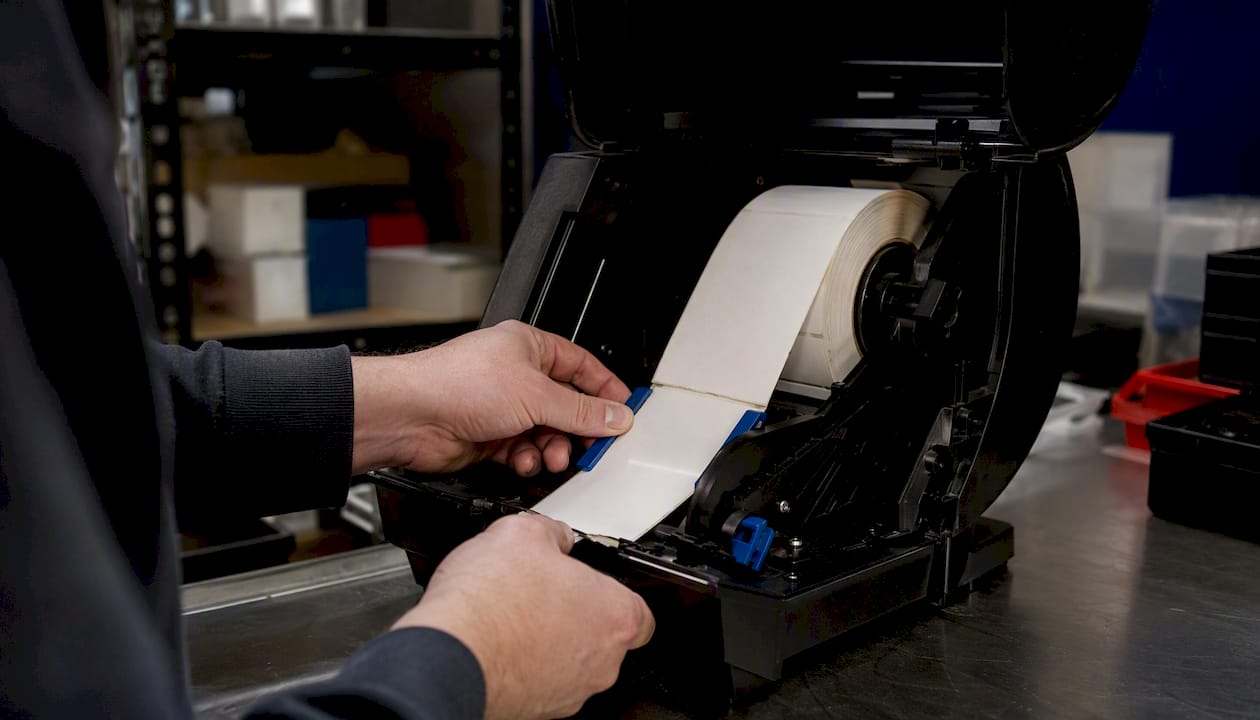
Open the top cover or media compartment door.
Mount the label roll so the print side faces up as it feeds toward the printhead. On most desktop models, labels unroll from the bottom of the roll.
Slide the media guides snug against the edges of the label stock. Snug means no gap and no compression. Guides that are too loose let the roll wander; guides that are too tight cause friction and feed errors.
Thread the media under the guides and through the sensor area. The gap sensor or black-mark sensor must have a clear line of sight to the label gaps or marks. Do not leave any protective stickers over the sensor window.
For thermal-transfer models, mount the ribbon supply spool on the supply spindle and the empty core on the take-up spindle. Attach the ribbon leader to the take-up core, remove any slack by rotating the take-up spindle, and align the ribbon edges with the media edges.
Common mistakes: loading the roll backward so the blank side faces the printhead (nothing prints), leaving transit tape over the sensor (calibration fails every time), and threading media over rather than under the platen roller.
The ZT231 Quick Start Guide and Zebra’s desktop printer initial setup article both break the loading process into hardware and host-system phases, which is a useful mental model. Get the hardware right first, then move to the software side.
Pro Tip: Before closing the cover, manually advance the media a few inches by pressing the Feed button. Watch how it feeds. If it wanders left or right, adjust the guides before running calibration. Catching a misaligned roll at this stage takes ten seconds. Catching it after a failed calibration takes ten minutes.
How do you calibrate a label printer and confirm it works?
Always run calibration before printing anything you care about. The printer needs to detect label gaps or black marks to know where one label ends and the next begins. Without calibration, it either feeds continuously or stops in the wrong place.
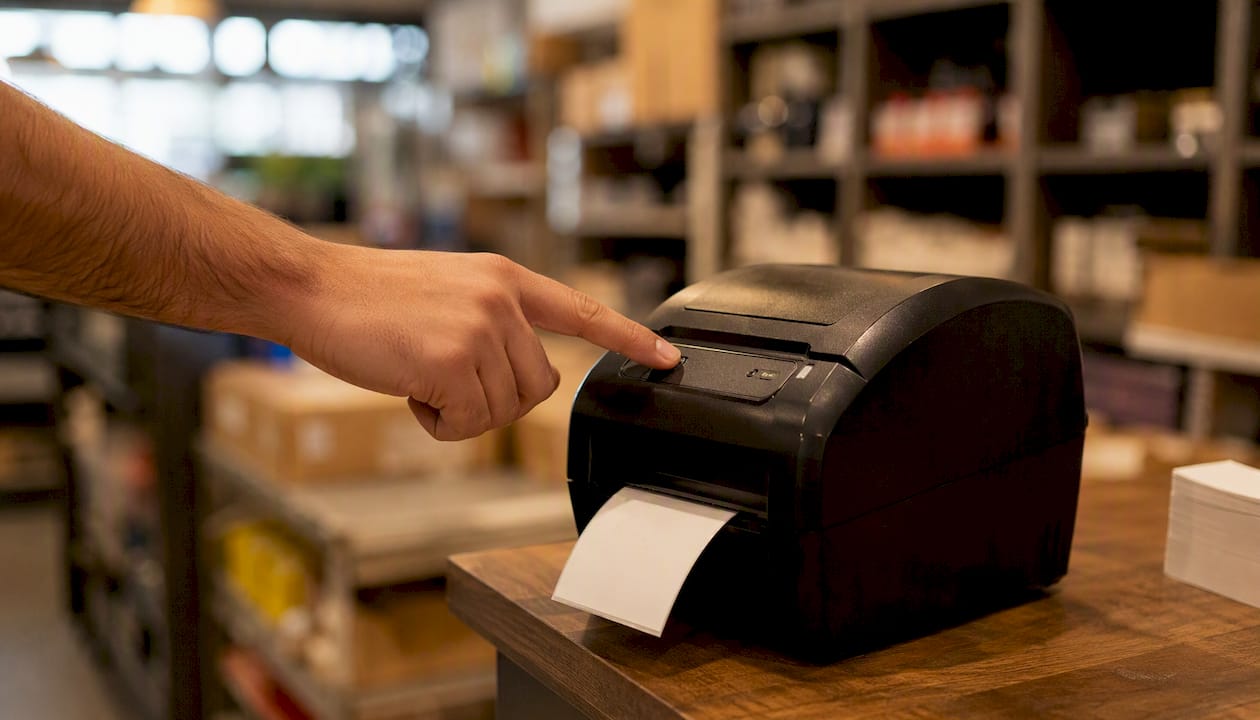
Calibration methods vary by model. On many Zebra desktop printers, you hold the Feed button during power-on to trigger an automatic sensor calibration sequence. The ZT231 Quick Start Guide documents the exact button sequence for that model. Zebra Setup Utilities also includes a SmartCal option that runs calibration from the host without button sequences. For HPRT models, the HPRT setup guide covers their equivalent calibration steps.
After calibration, print a configuration label. On most Zebra printers, a short press of the Feed button while the printer is idle prints a configuration report showing firmware version, media settings, and network configuration. This is your baseline verification document.
If barcodes print but fail to scan, the fix is almost always one of four things: re-calibrate the media, increase print darkness slightly, reduce print speed, or test with a production scanner rather than a phone camera. A barcode that looks fine to the eye can still fail a scanner if the contrast ratio is off.
Quick verification checklist:
Scan the test barcode with your production scanner, not a phone app.
Measure the printed label against the physical label stock. Margins should be consistent on all four sides.
Confirm the label size in Windows Printing Preferences matches the physical media dimensions.
Check that the darkness setting produces solid black lines without smearing. Smearing usually means darkness is too high or print speed is too fast for the media.
Pro Tip: If calibration fails to detect gaps, check whether the sensor is set to gap/web mode or black-mark mode. A sensor in the wrong mode will never find the gap regardless of how many times you run calibration. Reposition or switch the sensor type in the driver settings, then retry.
How do you connect a label printer to a network?
For network-capable printers, you typically need a local USB connection first to push the network settings, then a power cycle to apply them. Trying to configure network settings over the network before the printer has an IP address is a circular problem.
Preferred provisioning flow:
Connect the printer to the host via USB.
Open Zebra Setup Utilities (or the equivalent vendor utility for your brand).
Set the IP address (DHCP or static) or push the WLAN SSID and password. SSID and password fields are case-sensitive. A single wrong character means no connection.
Save the settings and power-cycle the printer.
Ping the assigned IP from the host to confirm the printer is on the network.
Print a network configuration label from the printer to verify the IP, subnet, and gateway are correct.
This workflow is documented in Zebra’s connectivity provisioning guide, which covers both wired and wireless provisioning via ZSU.
Wired vs. wireless at a glance:
Factor | Wired (Ethernet) | Wireless (Wi-Fi) |
Initial setup method | Direct Ethernet or USB + ZSU | USB + ZSU to push SSID/password |
Reliability | Higher; no RF interference | Adequate; sensitive to channel congestion |
IP management | Static or DHCP reservation recommended | Static or DHCP reservation strongly recommended |
Verification step | Ping IP, print network config label | Ping IP, print network config label |
Best for | Fixed POS counter printers | Mobile or flexible counter placement |
Reliability best practices:
Assign a static IP or configure a DHCP reservation in your router for every retail label printer. Dynamic addresses that change between reboots cause intermittent POS connectivity failures that are hard to diagnose.
Check that ZSU and firmware versions are current before provisioning. Version mismatches between the utility and firmware can cause settings to silently fail to apply.
For multi-VLAN retail environments, confirm the printer’s IP is reachable from the POS host subnet. Firewall rules between VLANs are a common blocker.
Pro Tip: A static IP or DHCP reservation is not optional for a retail environment. Address changes break POS connectivity in ways that look like printer hardware failures and waste diagnostic time.
For a broader look at how network readiness affects printer reliability across a store, the retail store IT infrastructure guide covers the network planning side in detail.
What should you do when the label printer setup fails?
Most setup failures fall into four categories, and most have a fast fix.
The majority of label printer problems trace back to two root causes: the driver was connected before it was installed, or calibration was skipped. Fix those two things first before assuming the hardware is defective.
Common errors and fixes:
“Unspecified device” in Windows: The USB was connected before the driver installed. Unplug the printer, uninstall any partial driver entries from Device Manager, reinstall the driver fully, then reconnect.
Media misfeed or label skipping: Re-run calibration. If it fails again, check sensor mode (gap vs. black-mark) and confirm the media guides are snug but not compressing the roll.
Ribbon error on thermal-transfer model: Rethread the ribbon. Confirm the supply and take-up spools are on the correct spindles and the ribbon is not twisted.
No network ping after provisioning: Verify the IP address on the network config label matches what you entered. Check subnet mask. Power-cycle the printer again. If using Wi-Fi, confirm the SSID and password are character-for-character correct, including capitalization.
Print jobs sent but nothing prints: Confirm the correct printer is set as default in Windows. Check the print queue for stuck jobs. Power-cycle the printer, then resend.
When a quick fix is not enough: persistent communication drops after power cycles, calibration that fails repeatedly despite correct sensor settings, or firmware update errors that brick the device mid-flash, these are situations where calling a professional saves more time than it costs. Sosasolutionsnyc handles exactly these scenarios for retail clients in New York and Florida, including remote IT support when an on-site visit is not immediately possible.
Pro Tip: Power-cycle the printer after every driver install and after every network setting change. Many settings do not take effect until the firmware reinitializes on a cold boot.
How long does a label printer setup take, and what does it cost?
Realistic time estimates by phase:
Unboxing and hardware placement: 5–10 minutes
Driver install and host configuration: 5–20 minutes (longer if Windows Update interferes or the wrong driver version was downloaded)
Media and ribbon loading: 5–15 minutes
Calibration and test print: 5–10 minutes
Network provisioning: 10–30+ minutes, depending on network complexity, VLAN configuration, and whether DHCP reservations need to be set up in the router
Total for a straightforward USB-connected desktop printer is usually within half an hour. A networked retail printer with static IP planning adds time.
Small costs to budget for:
USB cable or Cat5e patch cable if not included: $5–$15
Spare label roll for calibration and test prints: varies by media type
Thermal-transfer ribbon if applicable: varies by model and roll length
On-site professional labor if network complexity or POS integration is involved
Have these ready before you start to stay within the 15–30 minute window: the correct driver downloaded to the host, the interface cable, a roll of the labels you plan to use in production, and network credentials (SSID, password, and planned IP) if setting up a wireless printer. A store-opening checklist that covers non-technical readiness tasks, like clean windows and product visibility, is worth running in parallel so the full opening prep moves together.
When does a label printer setup need a professional?
Call a pro when the stakes are high enough that a failed setup costs more than the service call. Specifically:
You are opening a retail store and need guaranteed uptime from day one.
You have multiple networked label printers that need consistent configuration and POS integration.
Calibration keeps failing despite correct sensor settings and media orientation.
A firmware update failed mid-process and the printer is unresponsive.
The printer needs to communicate with a POS system across VLANs or through firewall rules you do not control.
Sosasolutionsnyc provides on-site store-opening IT setup across New York and Florida, including driver installation, media calibration, network provisioning, POS integration, and post-install test-print verification. The scope covers everything from a single counter printer to a multi-station retail environment.
What to have ready before a pro visit:
The printer on-site and unboxed
A roll of the production labels you plan to use
Network credentials: SSID, Wi-Fi password, and any static IP or VLAN information
The host machine present and logged in with admin rights
Access to the router or network switch if IP reservations need to be set
Pro Tip: Ask for a post-installation configuration report and a short staff handoff walkthrough. A technician who leaves without showing someone how to reload media and rerun calibration creates a support call the next time a label roll runs out.
For businesses evaluating whether a managed IT contract makes sense after the initial setup, the IT support contracts guide covers what to look for in ongoing coverage.
Why correct setup discipline pays off in retail
Most label printer problems I see in retail environments are not hardware failures. They are process failures: a driver installed in the wrong order, calibration skipped because the labels looked close enough, or a dynamic IP that changed overnight and broke the POS connection at 9 AM on a busy Saturday.
The direct thermal vs. thermal-transfer distinction matters more than most small-business owners realize. Running the wrong media type through a thermal-transfer printer does not just produce bad labels. It accelerates printhead wear in a way that shows up as a repair bill six months later, not immediately. Getting that pairing right during initial setup is a five-second decision with a multi-year payoff.
Driver-first installation and a proper calibration run take maybe ten extra minutes compared to plugging everything in and hoping Windows figures it out. Those ten minutes eliminate the most common failure modes before they happen. For a store opening, where the first day of operation depends on the printer working, that discipline is not optional.
Sosasolutionsnyc handles your printer and store-opening IT setup
Retail store openings in New York and Florida move fast, and a label printer that is not ready on day one creates real operational problems. Sosasolutionsnyc’s store-opening IT solutions cover the full printer setup workflow so you do not have to troubleshoot driver conflicts or network provisioning on opening day.
On-site technicians handle driver installation, media loading and calibration, network provisioning with static IP or DHCP reservation, POS integration, and a verified test-print confirmation before they leave. Staff get a short handoff walkthrough so the first label roll change does not require a support call.
To speed the visit, have these ready:
Printer unboxed and on-site
Production label roll
Network credentials and any IP reservation details
Host machine present with admin access
To book a setup visit or get a quote for POS and printer installation support, contact Sosasolutionsnyc directly through the service page.
Sources
Recommended
Comments